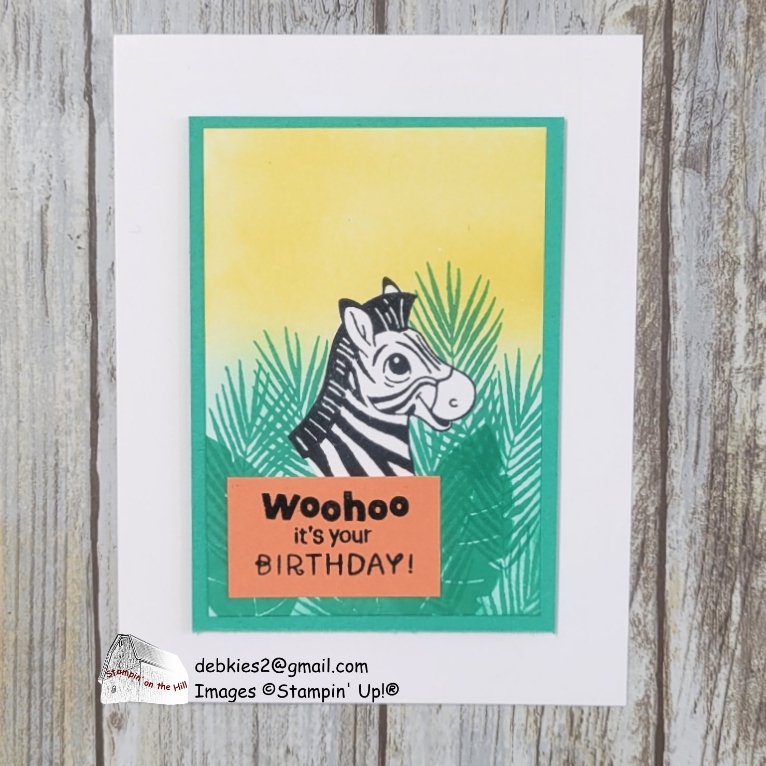
The December product of the month is the Silly Safari Bundle (165260). I’ll be using only the stamp set in this post, but there are so many possibilities. Whether you’re a beginner or seasoned stamper, this masking tutorial will help you take your creations to the next level!
Measurements:
- Basic White: 5-1/2 x 8-1/2 scored at 4-1/4 base)
- Basic White: 2-3/4 x 4 (focal layer)
- Shy Shamrock: 3 x 4-1/4 (layer)
- Timid Tiger: 1-3/4 x 1 (greeting)
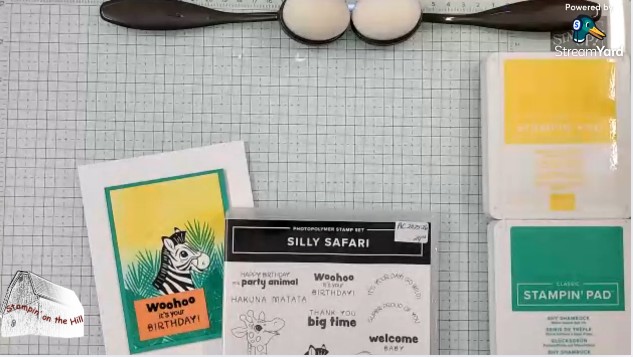
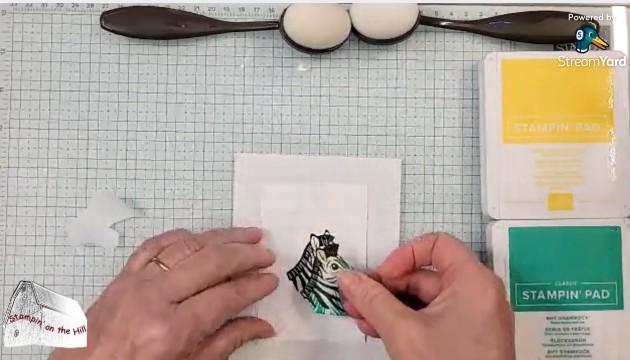
I select the image I want to be in the foreground and start by making a mask. I’m using masking paper, but you may use a post-it note instead. Just be sure to stamp where it’s sticky on the back. When I cut, I am undercutting just a little so the image has a little left on the waste piece.

Now I stamp the image on my project, place the mask over it and begin adding color and other images that I want in the background.

After I’m finished adding the background over the mask, peel it off. It’s magic! The zebra now looks like it’s in the foreground! I layered it onto Shy Shamrock and placed my greeting over the extra white at the bottom of the neck. Then I added it to the card front.
To see the full video:
