
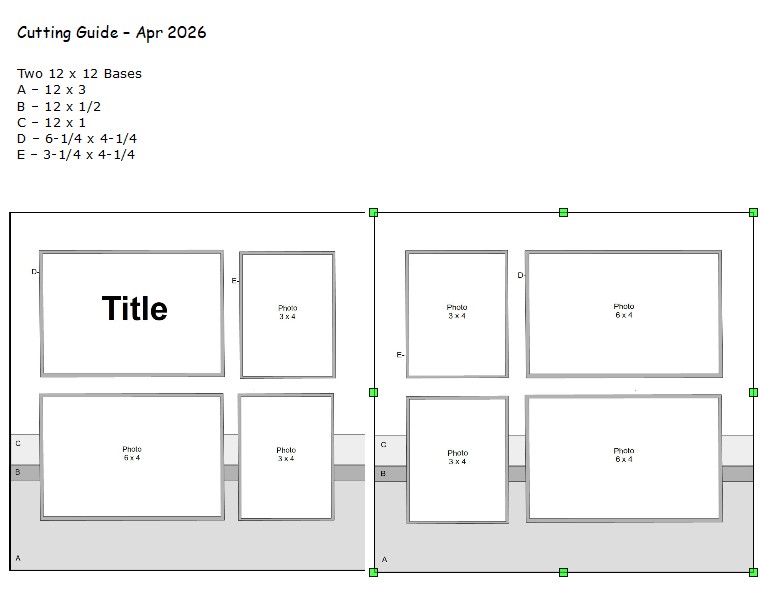
Begin by choosing the pieces listed at the top and coordinating colors with Designer Series Paper. I like to cut and dry fit all these together to get a feel for empty space that I want to fill. Don’t get me wrong, some empty space is completely fine. I prefer simple over too busy.
I also printed photos. I use an Epson Ecotank printer which includes software that I can print two photos on one 4×6 sheet of photo paper. I cut these apart for the 3×4 photos.
I modified the layout a bit because I had so many photos. And of course most were the wrong orientation! Those that were supposed to be 3×4 (2 per page) are now 4×3 (3 per page). Plus I used flip flaps! Have I mentioned how awesome flip flaps are? Lots more photos can be used than just what you see on the surface.
Of course, I also managed to work in the Nature’s Symphony stamp (April featured product) to fill in some of that blank space before I started adhering the layers.
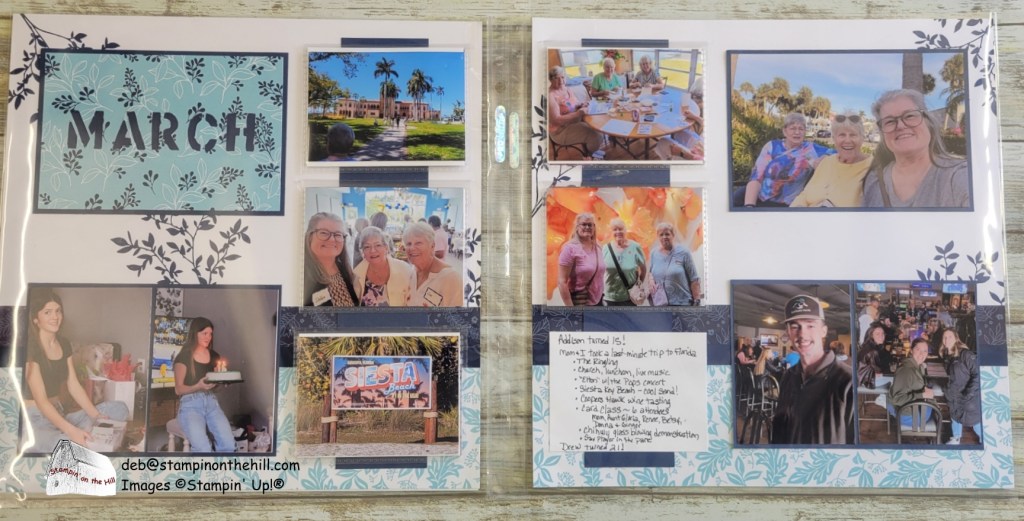
Let’s talk about that title! Ideally, I would have alphabet dies to cut the letters out of the DSP. I didn’t have any the right size. So of course I improvised! I happened to have found (as I was purging) several sets of those old-style stencils. I penciled them on first to be sure of the alignment and then used an X-Acto knife to painstakingly cut them out. Then I mounted it onto the Night of Navy mat. Although I like how it turned out, I’m looking forward to Stampin’ Up! introducing some new alphabet dies this size (1″) sometime soon.
